When life throws you lemons
There’s a saying “When life throws you lemons, make lemonade”. I find it a peculiar saying, because lemons are pretty desirable objects to me.
Although I understand the concept behind this idiom, that we’re supposed to see lemons as sour, sharp and unpleasant representations of life, I just can’t do that. They’re such bright, joyful fruit that it just doesn’t wash. I’m someone who has a bowl in the kitchen which is just for lemons and limes to nestle in, so if someone started throwing me lemons, I’d be out there filling up my bowl and shouting ‘thanks’.
The lemon preservation society
I keep on discovering these little techniques and basic preparations that when I try them out, discover they’re incredibly simple. For example, making yoghurt, who knew it’s so easy? Sun dried tomatoes made in the oven? Simple. There are lots of straightforward ingredients that can be produced simply at home if you can find just a little bit of time to squeeze in the prep. And as with a lot of these processes, once you’ve done them a couple of times and know the routine, you can do them pretty quickly.

And for the budget conscious, there’s a massive saving found here. I bought 5 lemons for £1 from my local grocer, which, with a bit of salt is enough to do a medium/large jar. The online supermarket that I use sells a 350g jar of preserved lemons for £2.82, making them 282% more expensive than these home made version. The only drawback with this saving is that you have to wait a month before you can spend your winnings, so to speak.
But, after that wait, those winnings taste so fresh and spritely compared to the shop bought versions that they’re worth waiting for. These lemons are bottled sunshine, they brighten up food just as much as they brighten up your kitchen.
Lemony variety
Unlike some bloggers, who obsess over using specific types of lemon for this insisting it makes a huge difference, I’m quite laissez-faire about the whole thing. If you buy better quality ingredients, it’s probably going to taste better, QED. But, in my opinion, it’s much more important to just try these ideas out, rather than giving up because you can’t find a specific variety of lemon. I don’t think being overly prescriptive is going to encourage you at all, I’d rather help educate you, so that you can make your own choices. Whichever lemons you use, these are going to taste good.
To wax, or not to wax?
Lemons often get waxed after being picked to help prevent them shrivelling or spoiling before they hit the shelves. Even organic lemons are sometimes waxed, albeit with an organic wax. This wax might have a slight impact on flavour, a very minimal one, and in the grand scheme of life it’s probably not worth worrying about unless you’re aiming for a Michelin star. Also, wax isn’t anything to worry about ingesting in such tiny quantities.There may also be fungicides or chemicals present within these waxes to help the lemons last longer and it is this additive which organic lemons will not have on their skin. Although it is suggested that these chemicals are generally safe for consumption in very small doses, the lines become distinctly blurred here as it’s hard to pin down how much you’re chemical you’re ingesting when you consume the zest.
So, it is preferable to try to remove these chemicals and avoid ingesting them. You can do this by pouring very hot or boiling water over the lemons, then giving them a good scrub with a vegetable brush and a final brushing and rinse under cold water.
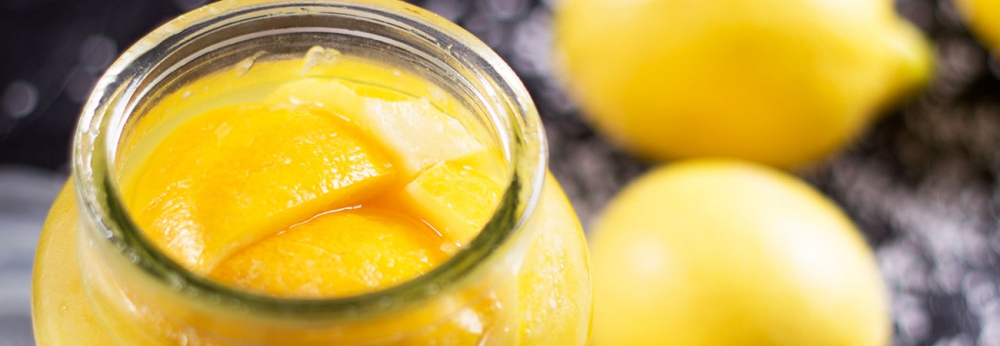
How to make preserved lemons
By Gavin Wren
Serves as many as you like
Uses a jar
PDF recipe card to download or print
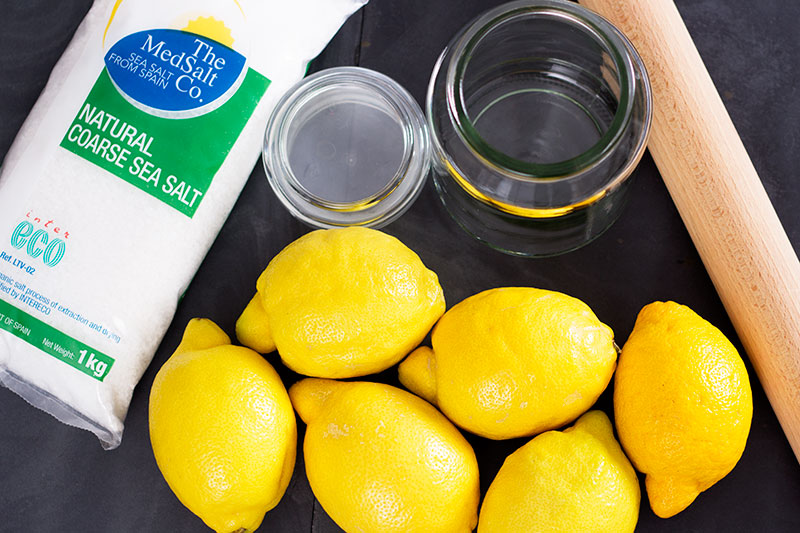
Ingredients
A large jar
More lemons than you think you can squeeze into that jar (about 4 per 500ml of jar, plus one or two extras), either unwaxed or cleaned.
1.5 tablespoons of course sea salt per lemon, plus extra
Directions
Rinse the lemons under very hot or boiling water, then scrub with a vegetable brush and rinse, whilst scrubbing under cold water.
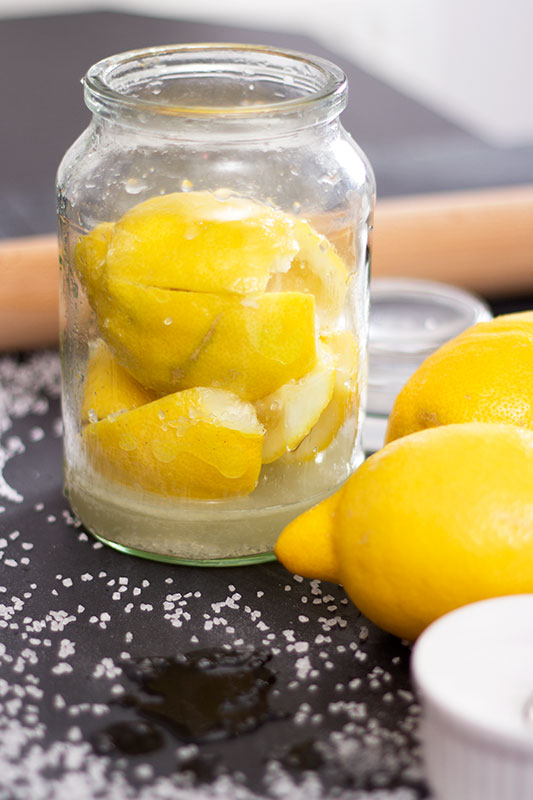
Once the jar is at room temperature, put 1 tablepoon of salt in the bottom.
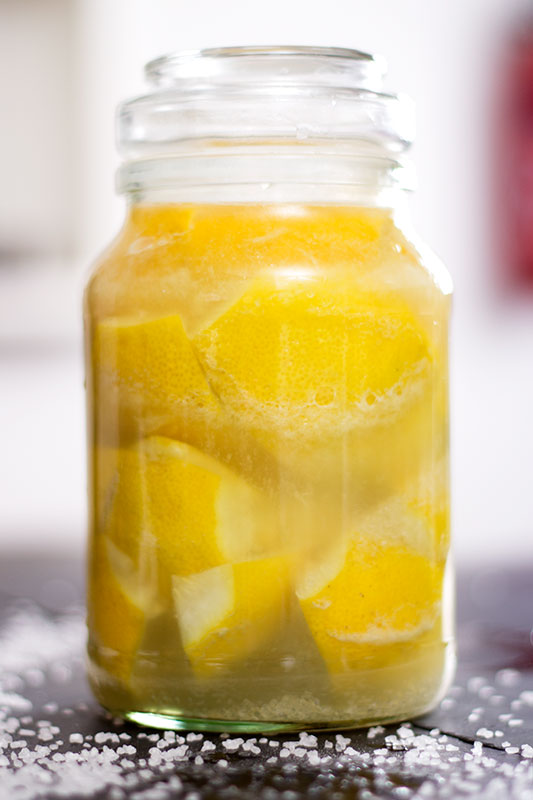
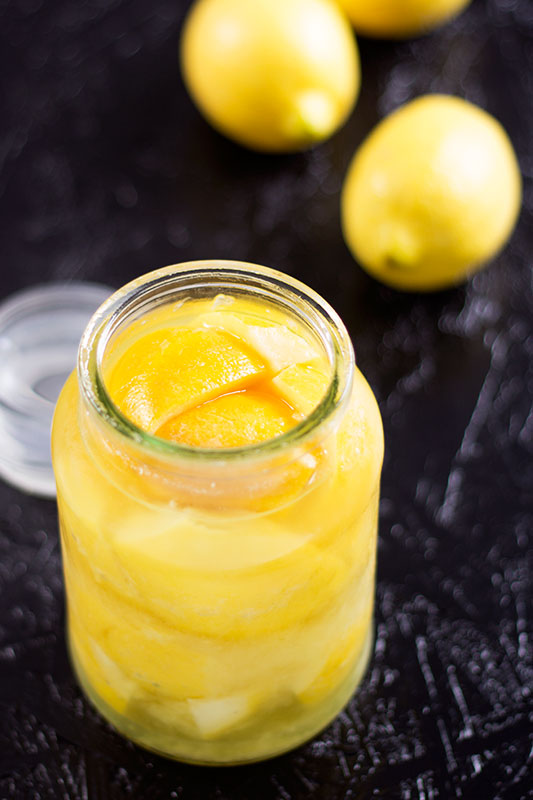
Cut the little stalk end off the lemon, then slice the lemon lengthways, only cutting 90% of the length, so you end up with a four-pronged lemon. Rub 1 tablespoon of salt into the openings and then put the lemon in the jar and sprinkle with 1/2 tablespoon salt. Repeat with more lemons, each time using something like a spoon or rolling pin to squash the lemons down into the bottom of the jar. As you squash them down, they should release their juice, which should stay at a similar level to the lemon flesh.
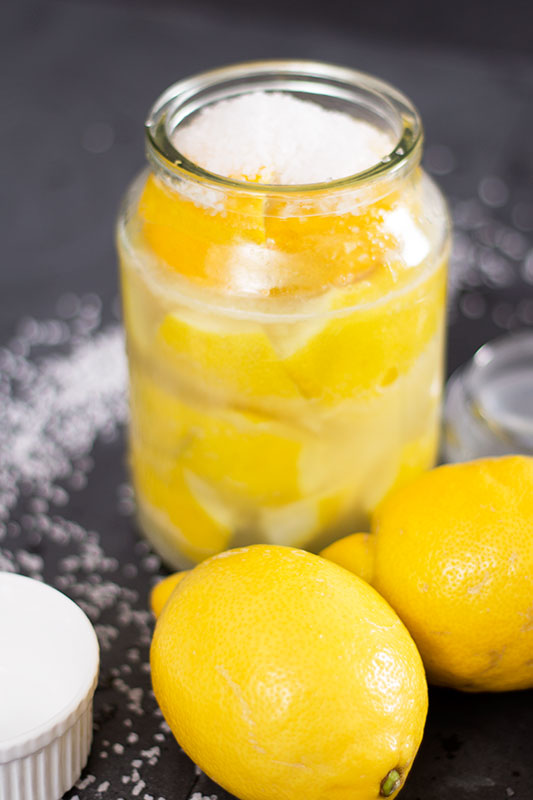
Once you reach the top of the jar with the lemons all squished and squashed in there, add another tablespoon of salt and if the juice doesn’t cover the lemons, top it up with additional lemon juice.
Seal the lid securely, then leave the jar on the side in the kitchen for 1 week, shaking it up every day. After that, put it in the fridge and wait for another 3 weeks before using them.
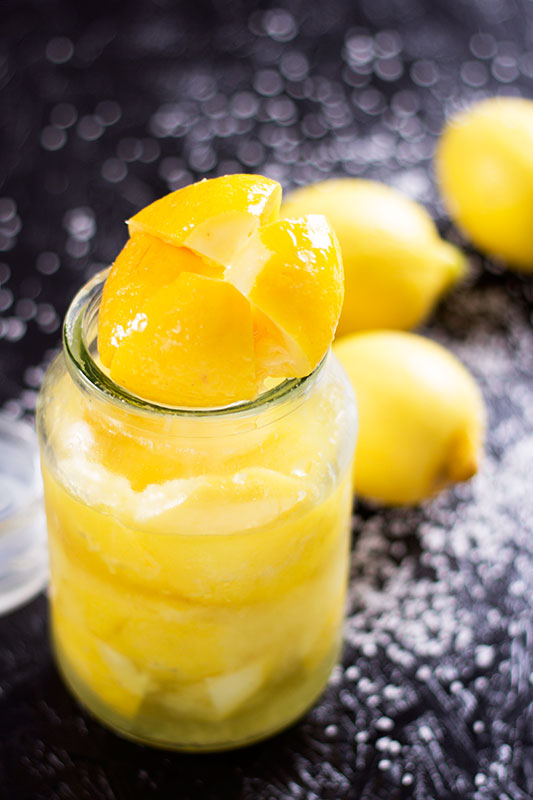
To serve, remove a lemon from the jar, rinse it under cold water to remove the salty coating, then it’s ready to use.